| Culvert of Abyss | |
|---|---|
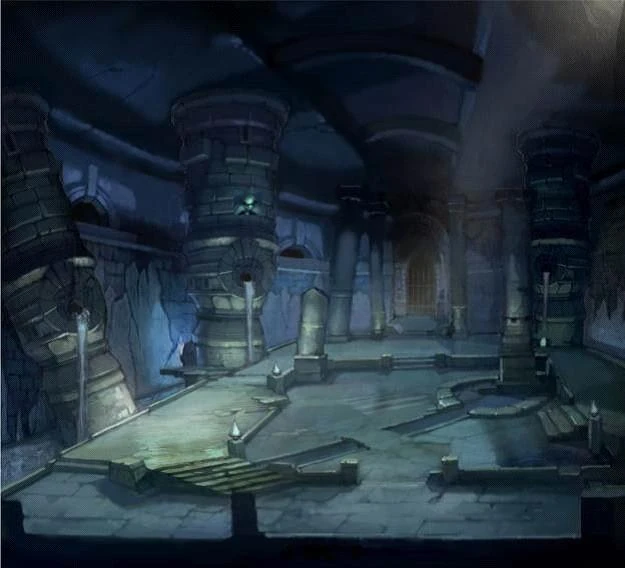 The smelly sewers. | |
| Info | |
| Location | Northwest of Delta Town |
| Race | Norman, Fish, Animal |
| Level | 50 |
| Cooldown | 1 week |
| Technical Name(s) | not applicable |
The Culvert of Abyss is a hidden waterway deep in the midst of Berta Delta. Because of its inconspicuous location, Lord Grupazh of Alberta began stocking weapons there to use against the Freyjanity should the need arises. Unfortunately, powerful monsters have made themselves home in the culvert and thus recovery efforts to relocate the weapons were underway lest the weapons be used against the people they were meant to protect.[1]
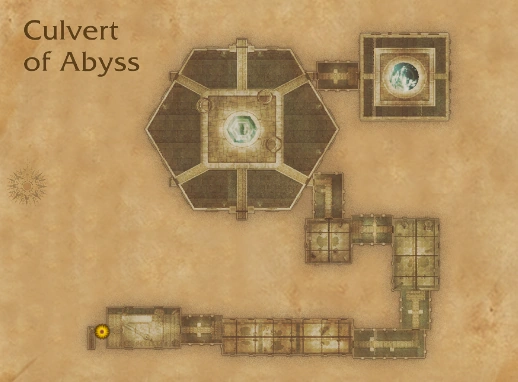
Maps[]
NPCs[]
Bosses
- Rockstar Heroes
- Golden Robberbug
- Mini & Mongi
- Aromine
- Ratmaster Kremp
Walkthrough[]
Rockstar Heroes[]
Rockstar Heroes First Stage
When you enter battle with the Rockstar Heroes, each Rockstar will summon a crazy fan. They will become stronger as time goes on. After a certain amount of time passes, the crazy fans will evolve to groupies and they will attack the Rockstar Heroes. It depends on the party to kill them or wait until they become and ally and attack the bosses. It’s your choice.
Rockstar Heroes Stage Two
After a certain amount of time, the Rockstar Heroes will use a warp skill called “Band Reunion”. Each named monster will teleport to a fixed location and start to cast using “Peak of Highlight”. After they finish casting, the named monster will use a wide area attack. It is important that the party figures out the mlocation of the 3 named monsters and move to the location where the Peak of Highlight cannot reach.
Golden Robberbug[]
Red Robberbug First Stage
Golden Robberbug’s eggs are set up around the Golden Robberbug in a circle. When the battle begins, new-born robberbugs will appear every so often from the eggs. If you don’t kill the new-born robberbug quickly, they will evolve into a growing robberbug and then to a complete grown robberbug. Complete grown robberbugs use long distance attacks that are random, so it is important to finish them off before they fully grow.
Red Robberbug Stage Two
When Golden Robberbug’s HP reaches a certain point, Golden Robberbug will have one of three types of auras (red/blue/gold). Golden Robberbug will have a different effect for each aura:
Red Aura - Movement speed slows and Golden Robberbug’s attack power becomes very strong. Tanks will need to move to avoid large amounts of damage.
Blue Aura - Movement speed speeds up and Golden Robberbug’s attack power becomes weak. At certain points, Golden Robberbug will target a random raid member to attack.
Gold Aura - Golden Robberbug becomes invincible for a certain amount of time. When the Gold Aura appears, you will see a special type of floor has been created.
The tank should taunt Golden Robberbug to this floor. When Golden Robberbug steps on this floor, it will remove the invincibility status and buff the raid members attack power and speed increase while on the floor.
Mini & Mongi[]
MiniMongi First Stage
When you enter the boss rom, you can see 3 speakers are around Mini & Mongi.
Speaker is basically unbeatable, and DJ Juniors are protecting Speaker.
When the battle begins, because Speaker makes a buff that increases the attack power and defensive skill of Mini & Mongi, you must kill DJ Juniors quickly. Destroying the Speaker is up to the raid groups’ preference.
MiniMongi Stage Two
Among the various skills that Mini & Mongi have, they will sometimes have an Eardrum Damage Debuff.
Once the Eardrum Damage Debuff accumulates to three stacks on a player, they will die. Always check the debuff on the upper right hand side of the screen. The tank has a high possibility of accumulating this debuff, and should be switched with another tank before three stacks.
Aromine[]
Aromine Stage One
There are three Seal Stones around Aromine’s place, and they make Aromine unbeatable.
Destroy the three Seal Stones to make Aromine beatable, and then you can do battle with Aromine.
Aromine Stage Two
When Aromine’s health decreases under a certain level, Kobug Lord will be summoned.
It is impossible to tank Kobug Lord since Kobug Lord will change targets periodically.
It is better to focus your attack on Aromine to avoid being attacked by Kobug Lord.
Rat Master Kremp[]
Ratmaster Kremp Stage One
When the battle starts with Rat Master Kremp, Ratmaster becomes unavailable to attack and summons Leo, the Turtle Assassin.
When Leo’s health decreases to a certain level, Leo will summon other Turtle Assassins.
If you can’t defeat them quickly enough, you will have to fight Rat Master with four Turtle Assassins.
The goal should be to defeat the Turtle Assassins quickly.
Core of Energy and Fragment of Energy
During battle, when Rat Master Kremp’s health decreases below a certain level, Core of Energy will be summoned.
Destroy Core of Energy quickly since it will increase Kremp’s attack power periodically.
When Core of Energy is destroyed, it will create Fragment of Energy around the area. This Fragment of Energy will use a damage and defense decrease debuff together. Therefore, melee classes should avoid the area when Core of Energy is destroyed and ranged classes should take care of Fragment of Energy.
Ratmaster Kremp Stage Three
Shadow of Abyss is summoned when Rat Master Kremp’s health is really low.
Targets attacked by Shadow of Abyss will die instantly. Always be aware of where the Shadow of Abyss is to avoid it quickly.[2]
References[]
- ↑ iRO2 Website 2013 Jun. 26
- ↑ iRO2 Website 2015 Oct. 21
External links[]
No data yet.